Vrchat Get Rid of Skybox on Upload
How to Pattern VR Skyboxes
Making skyboxes in Unity3D from a variety of different materials.
In my previous post, Making Sense of Skyboxes in VR Design, we went through some of the basics of skyboxes. I'd recommend checking information technology out for some background on the physics of skyboxes and types of 360˙ images and methods of capturing them. Now, let's talk near how to make skyboxes in VR using Unity 3D.
In VR pattern, a skybox is an environment lighting effect that'south rendered effectually the periphery of the scene. So imagine sitting inside a sphere, projecting an epitome onto the inside of information technology, and looking around. Actually, that's the gist of information technology. Implementing a skybox in Unity is just a matter of creating a skybox material from an paradigm and then adding it to the scene via the Lighting menu. Nosotros'll get into the details in a moment.
So if y'all're ready, let'south jump in and brand some skyboxes!
Getting set upwards
First off, download Unity 3D if you oasis't done then already. Information technology's complimentary. (I'yard using Unity 5.3, as of this writing.) I'd recommend developing for Paper-thin if you're still new to Unity, simply for ease of use and cost effectiveness. You simply need a phone and a Paper-thin viewer (about $fifteen on Amazon or Google's website.) I won't get into the details here well-nigh how to setup your Unity workspace for Cardboard or how to build out and run your demos — there are a lot of tutorials that explain it pretty well. Only brand sure you download the appropriate build back up components in the Unity download assistant (iOS, Android, or PC if you're building to Oculus.) If you're developing for another platform — like Rift, Gear VR, Vive, Daydream — this give-and-take applicative to all those too.
Once yous accept yourself ready in Unity and your platform of selection, I'd recommend creating folders to keep your assets in lodge.
In Projects > Assets, create a binder for each:
- Textures (images, textures, sprites)
- Models (3D assets)
- Materials (shader including skyboxes)
There are usually additional folders for Scripts, Animations, Fonts, Builds, etc., but we won't demand use those here.
Allow's get started!
Making a skybox from a cylindrical panorama
In this start example, we'll use a single cylindrical panorama image to brand the skybox. It's a good place to start tinkering with skyboxes if it's your outset time around. Remember though, the cylindrical panos are missing the peak and lesser of the paradigm (it's 360˙ on the horizontal centrality only). So this method is best for cases where you don't need an extremely detailed skybox and but want a background scene that focuses mainly on a horizontal view.
1). First, you lot'll need to find or create a stereoscopic panorama image. For the purposes of this tutorial, you can grab 1 from an online source like the Google Photo Sphere community or on Flickr. You tin can also make your own using the Cardboard Camera app for iOS or Android.
ii). Prototype settings:
Import the image into Unity as an Asset and save it into your Textures folder. Highlight the Texture and in the Inspector change the Texture Type to Avant-garde. Prepare the Mapping to Latitude-Longitude Layout (cylindrical). Hit Apply.
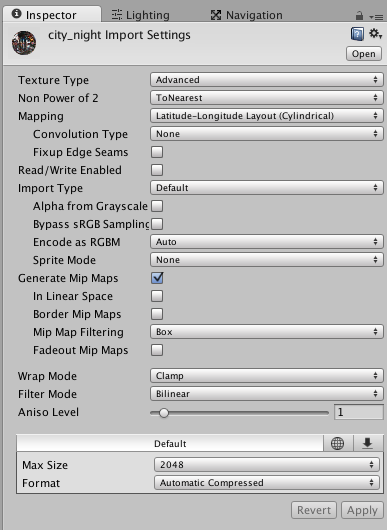
*Update: Step 2 has changed in Unity 5.5. In that location is no longer an "Advanced setting for Texture blazon. Instead use Texture Type: "Default" and Texture Shape: "Cube".
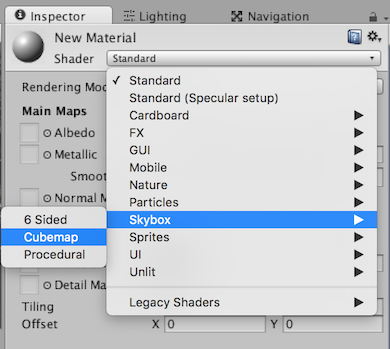
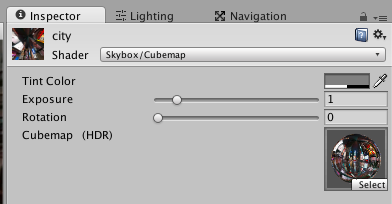
3). Create a Material:
(Assets > Create > Textile). And then in the Inspector modify its Shader to Skybox > Cubemap. Then give the new Material a name (I commonly name information technology the same as my Texture image.)
iv). Assign your Texture to the Material:
Highlight the Material in the Project window, get to the Inspector, and select or driblet your Texture image into the Cubemap (HDR) box.
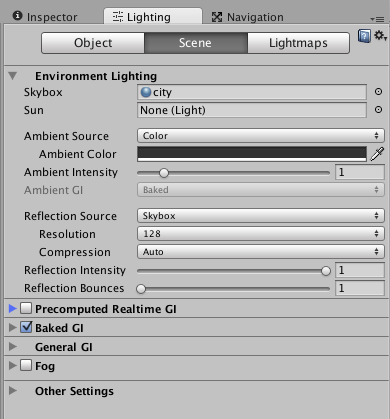
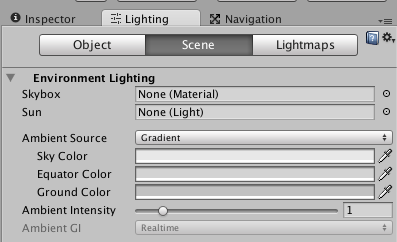
v). Assign your Material to the Lightbox:
Go to the Inspector > Lighting > Scene, then elevate the Textile to the Skybox belongings.
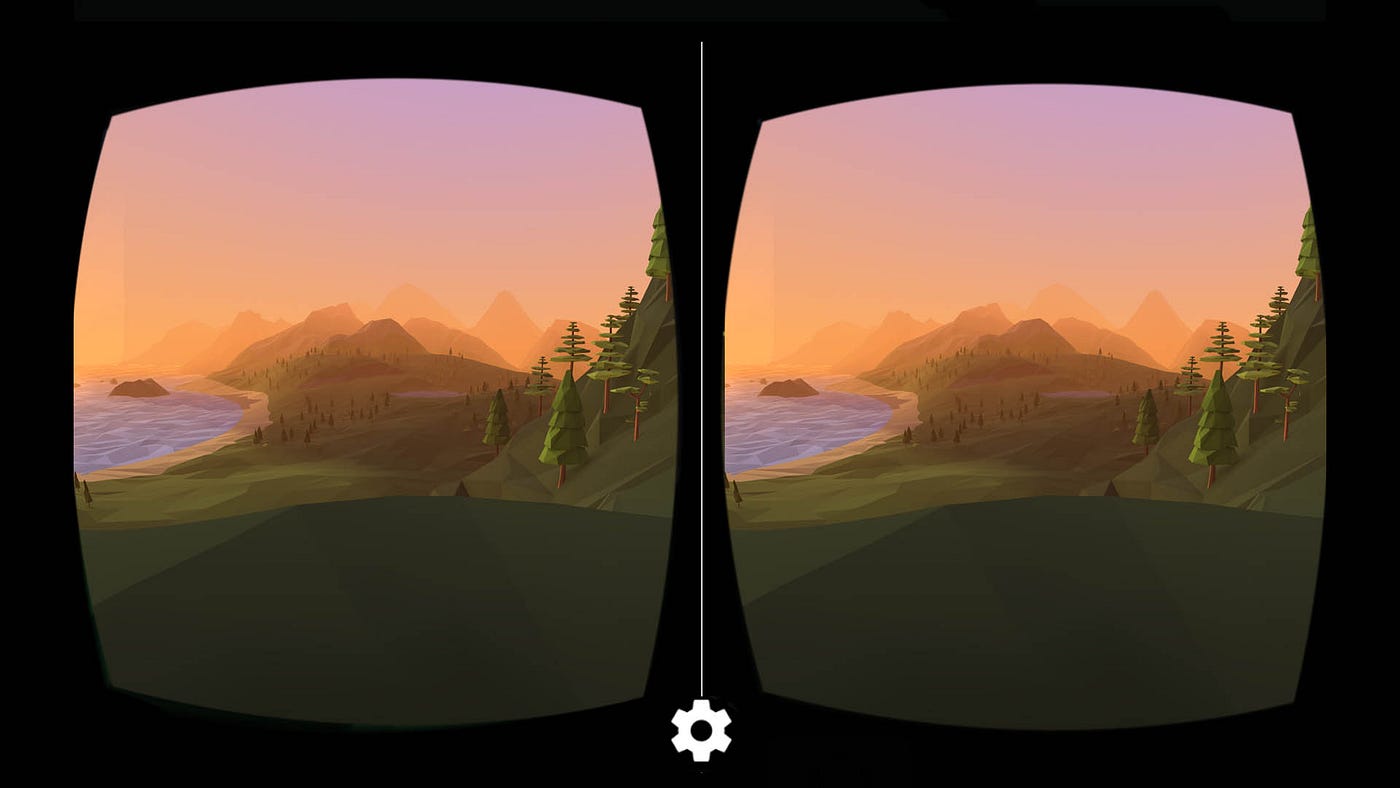
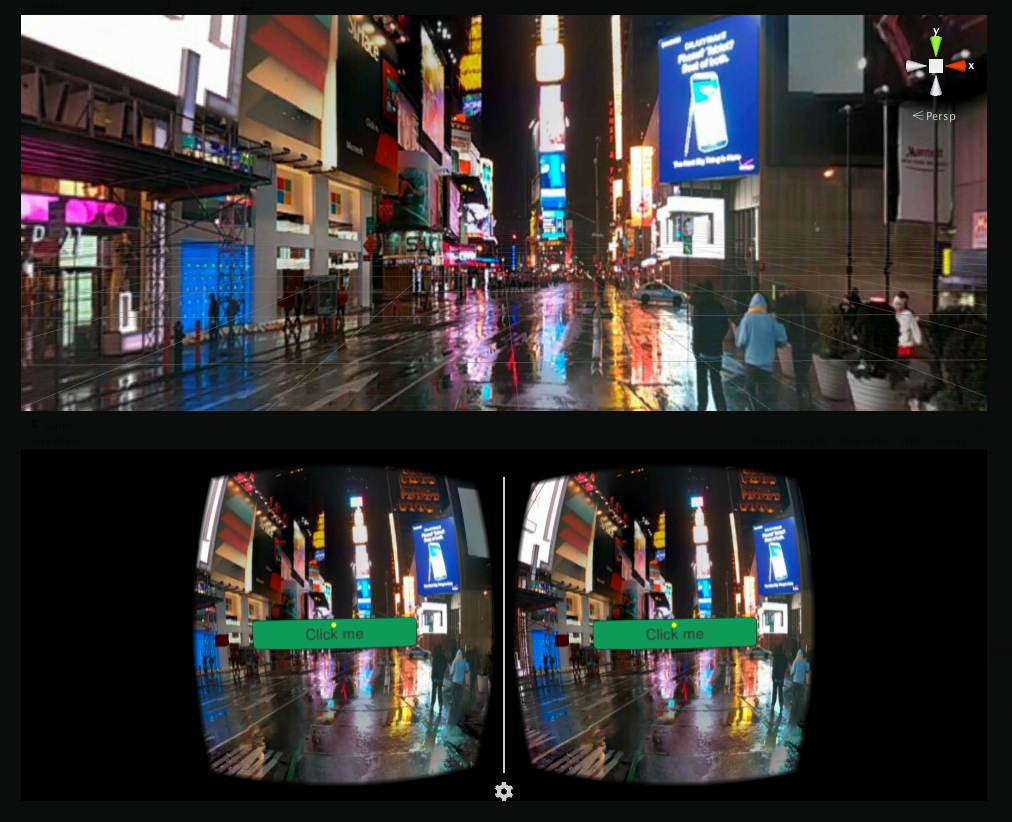
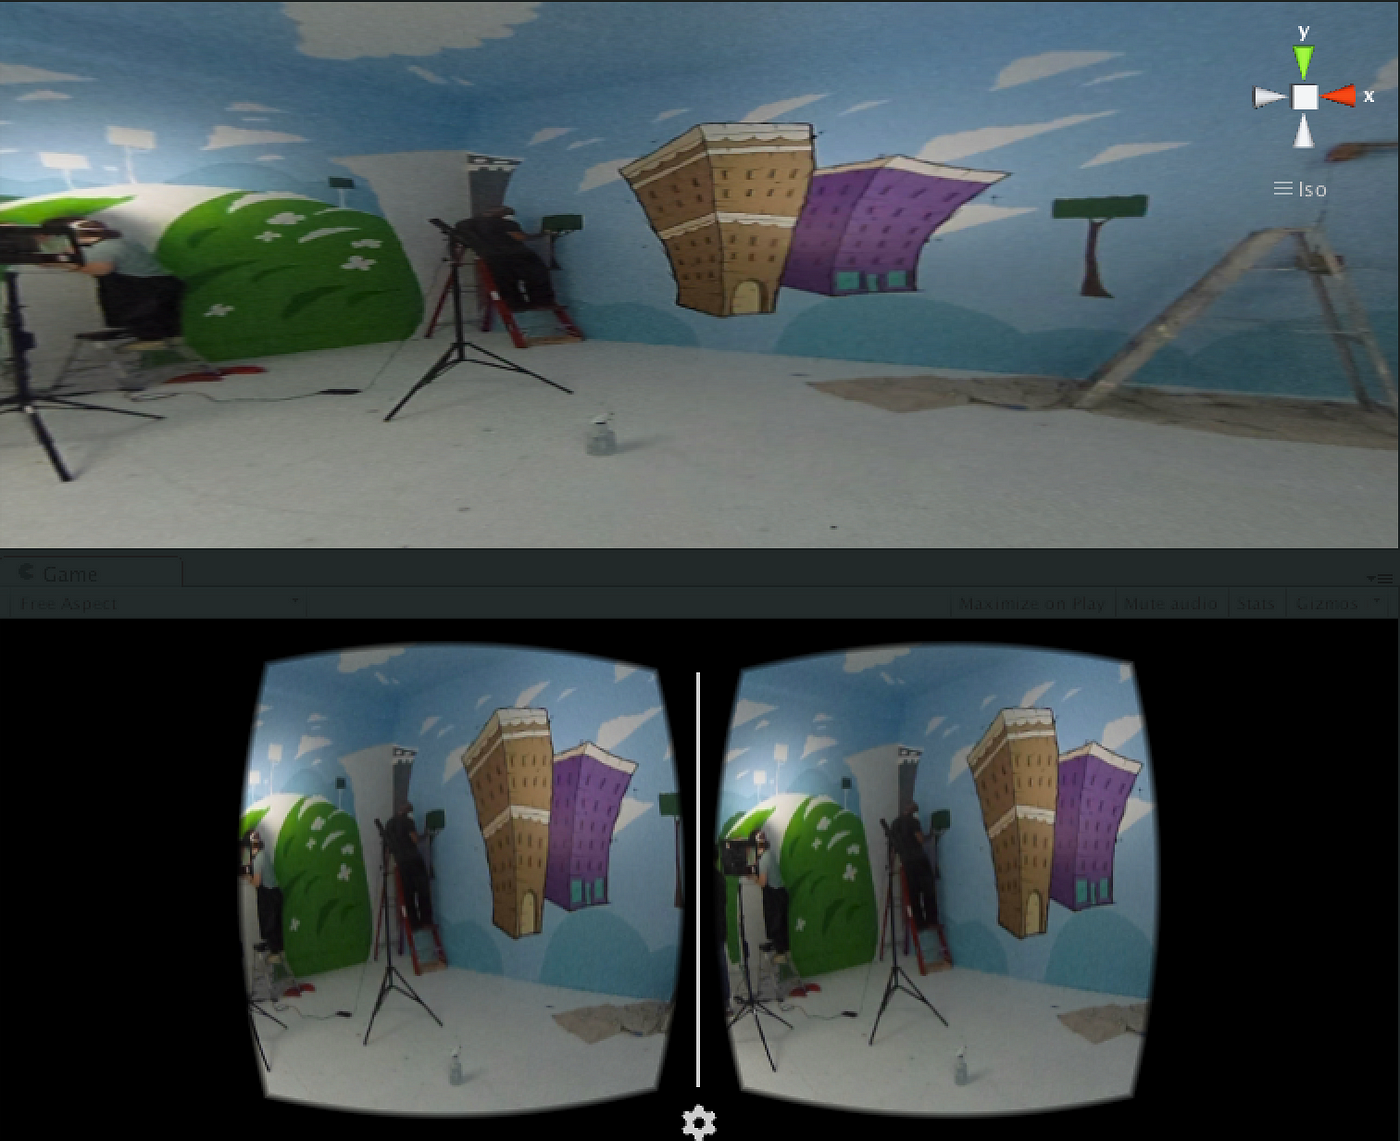
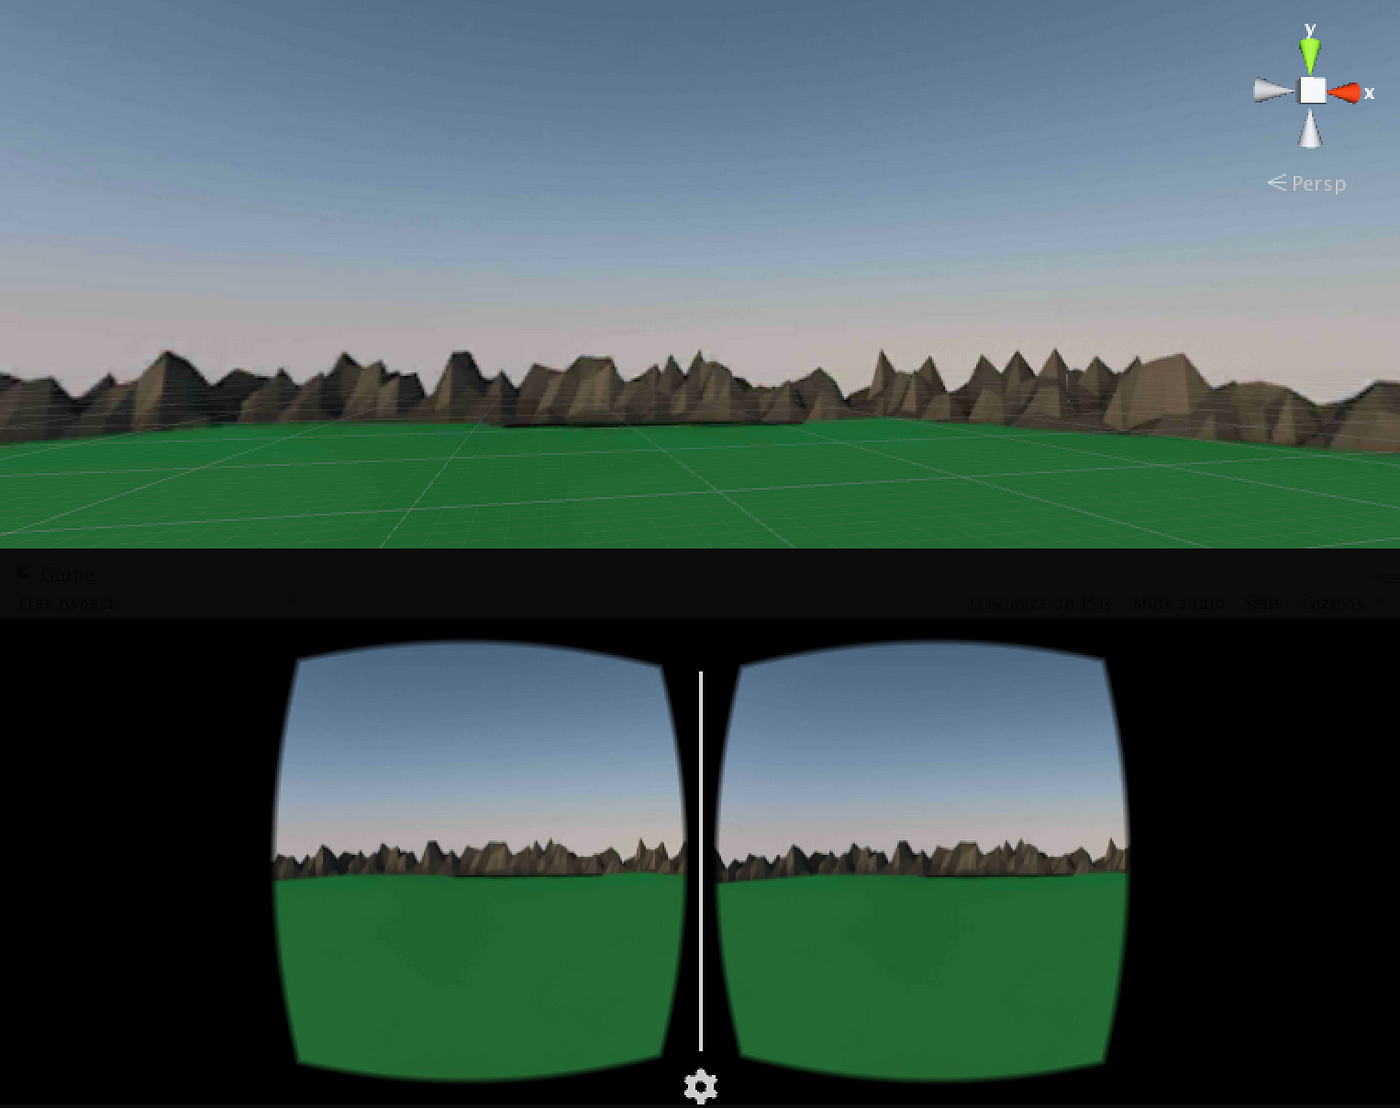
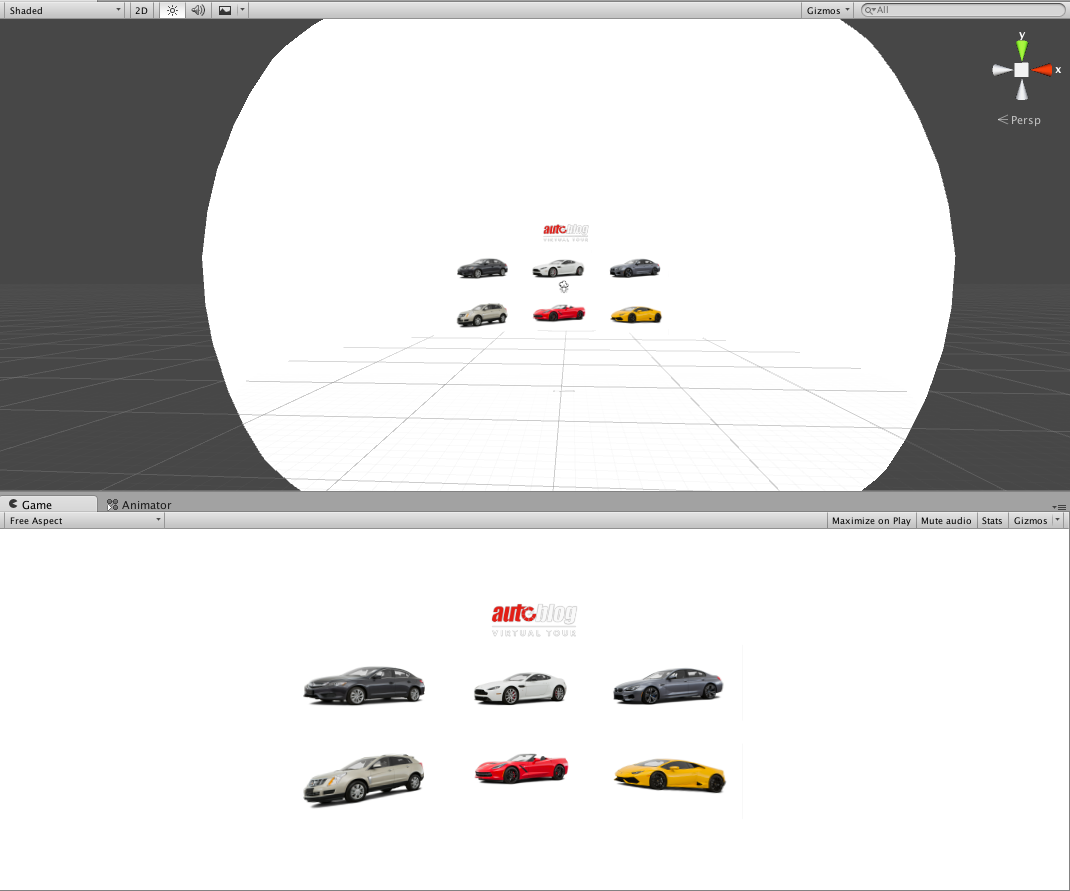
6). Hither's what you'll see in the Unity workspace:
I have the Scene view on the height and the Game view on the bottom (in stereoscopic view, since it'southward prepare for Cardboard).
7). Striking the Play mode in Unity and you'll exist able to mouse around the scene. You can likewise build it out and picket it on your telephone using a Cardboard device.
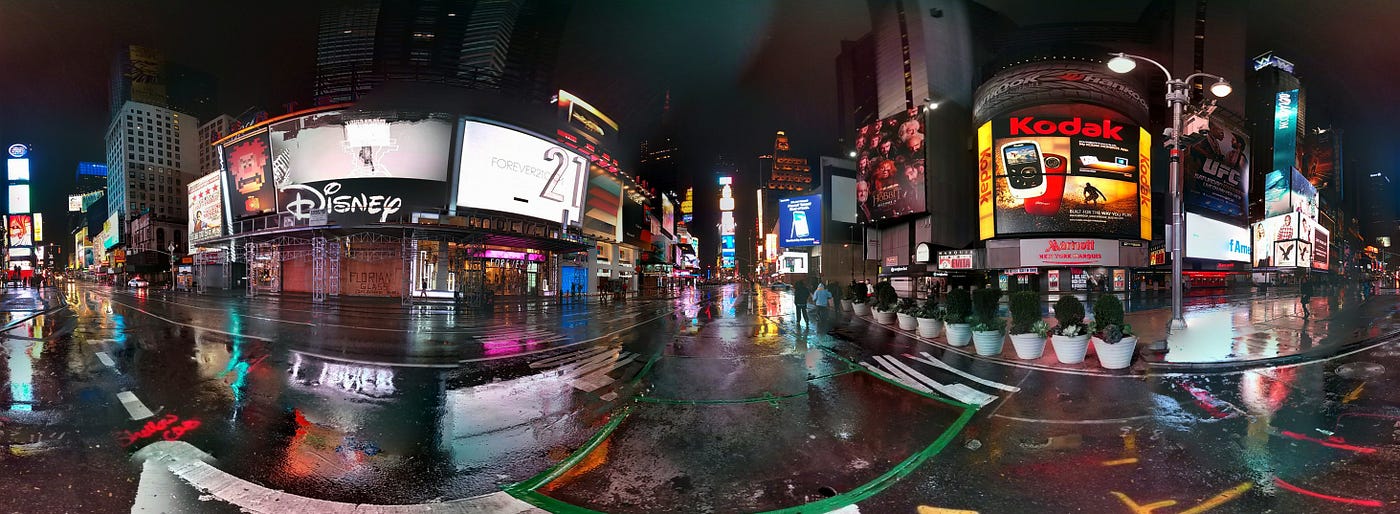
Making a skybox from a spherical panorama
Starting with a 360 x 180 equirectangular panorama to make a skybox is the same method as higher up, but it'll yield a full sphere skybox. You can find images online or take your own, if you have a 360˙ photographic camera similar the Theta Southward or Gear 360.
1). Follow the aforementioned steps as above for the cylindrical pano to import the Texture, create a Material, then map it to the skybox.
2). Here's your result:
Find how the top and bottom of the image look smoothen.
Making a skybox from cube mapped images
In this example, we'll use images that were captured as six sides of a cube and render them with Unity onto a skybox. This is a great method if you have access to these type of photos or have a rig to capture them. The level of particular is exceptional, covering the full 360 x 180 sphere.
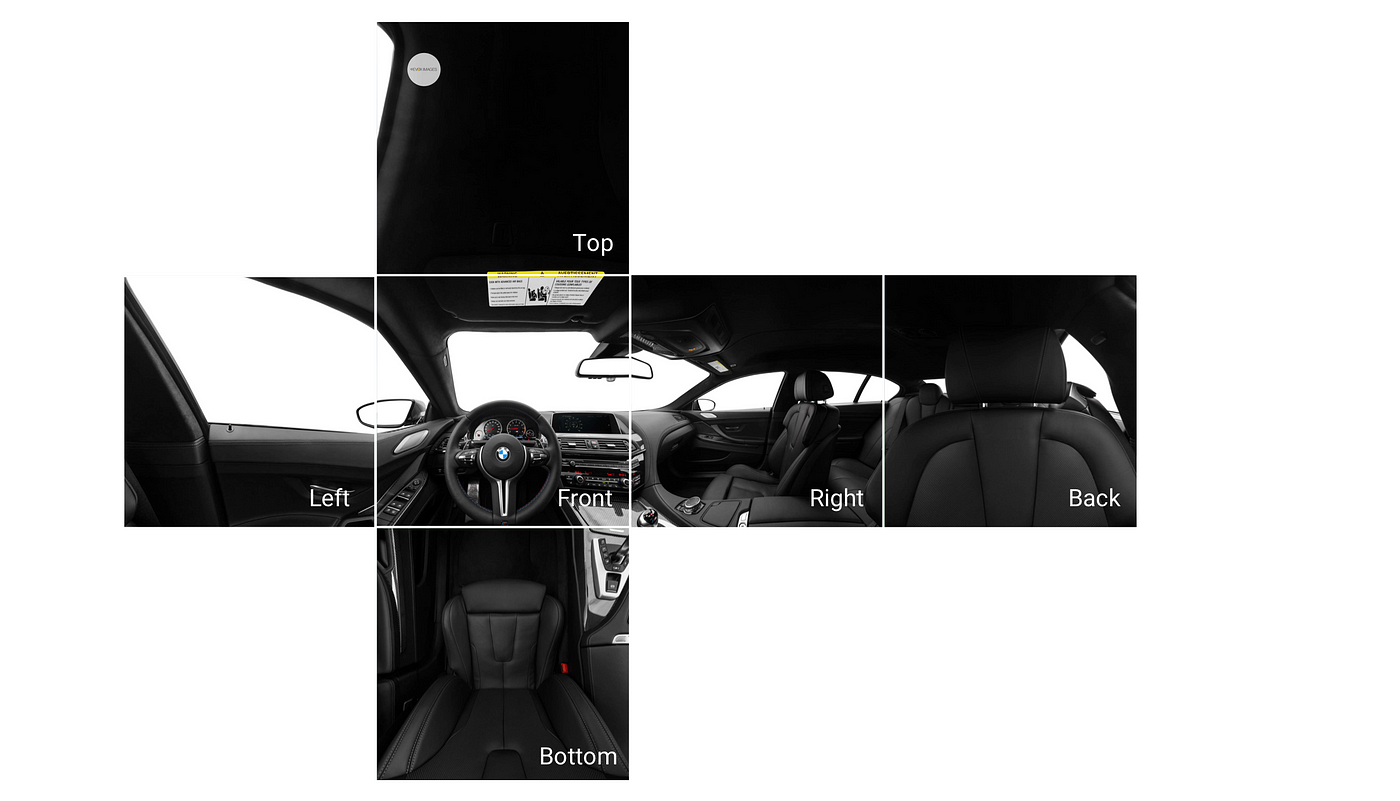
i). A series of photos are taken at 90˙angles from a single origin:
Front: 0,0,0
Dorsum: 180, 0, 0
Left: 270, 0,0
Correct: 90, 0, 0
Pinnacle: 0, ninety, 0
Bottom: 0, -90, 0
2). Import each of the photos as Assets:
Save them in the Textures folder (be certain each photo is labeled upward, downward, left, right, front, and back).
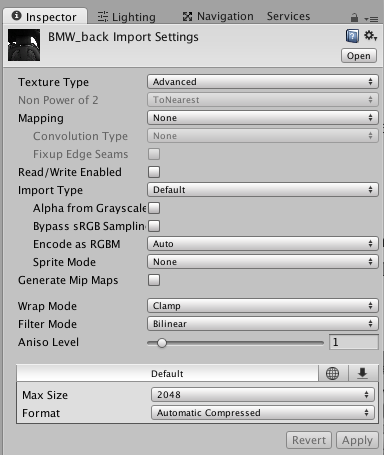
iii). Texture settings:
For each image, change the Texture type to Advanced, uncheck Generate Mip Maps, and modify Wrap style to Clamp (this stitches the edges properly). (*Run into note in offset tutorial nigh changes in Unity 5.5 and above.)
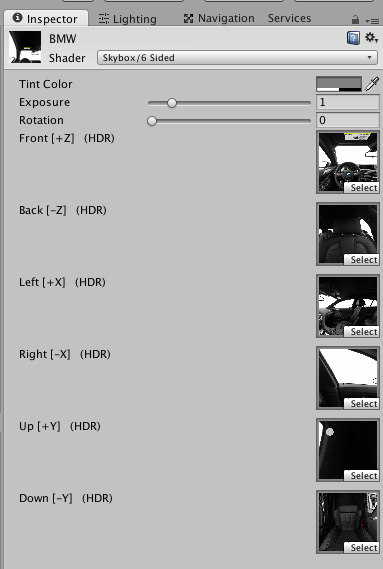
iv). Create a skybox Material:
(Avails > Create > Material) and change its Shader to Skybox, 6-sided and proper name the Material. Drag or assign each of your six images into the proper (HDR) boxes according to orientation.
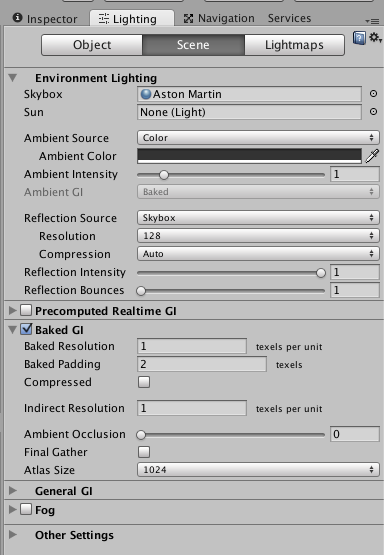
five). Assign your Material to the Lightbox:
Go to the Inspector > Lighting > Scene, so elevate the Textile to the Skybox belongings.
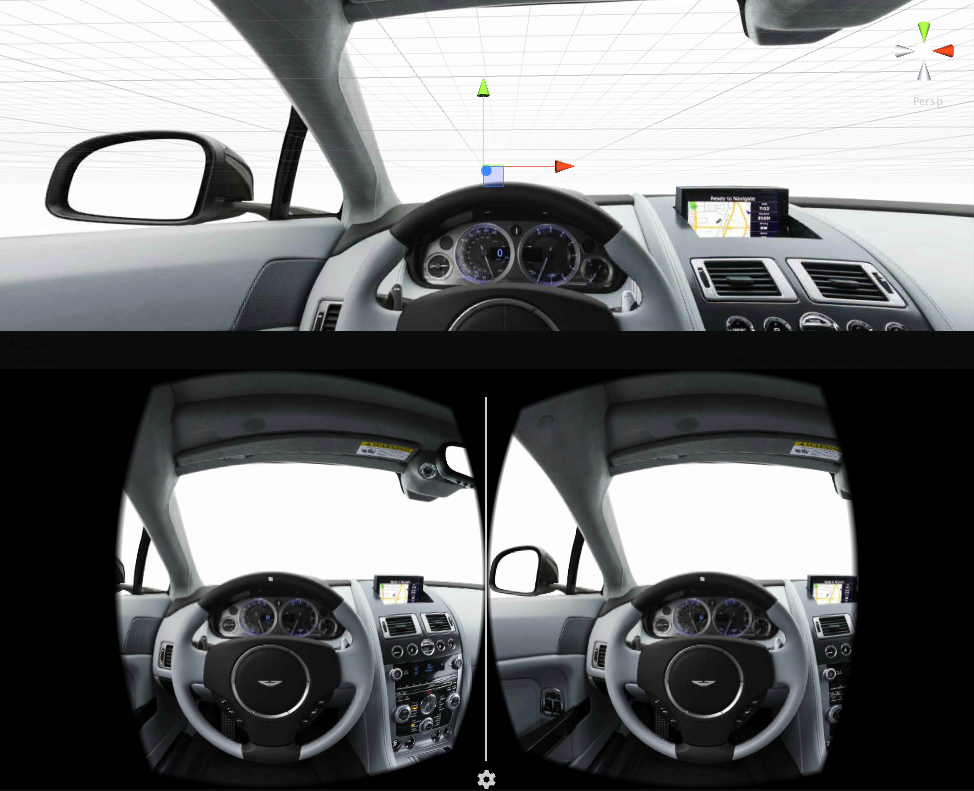
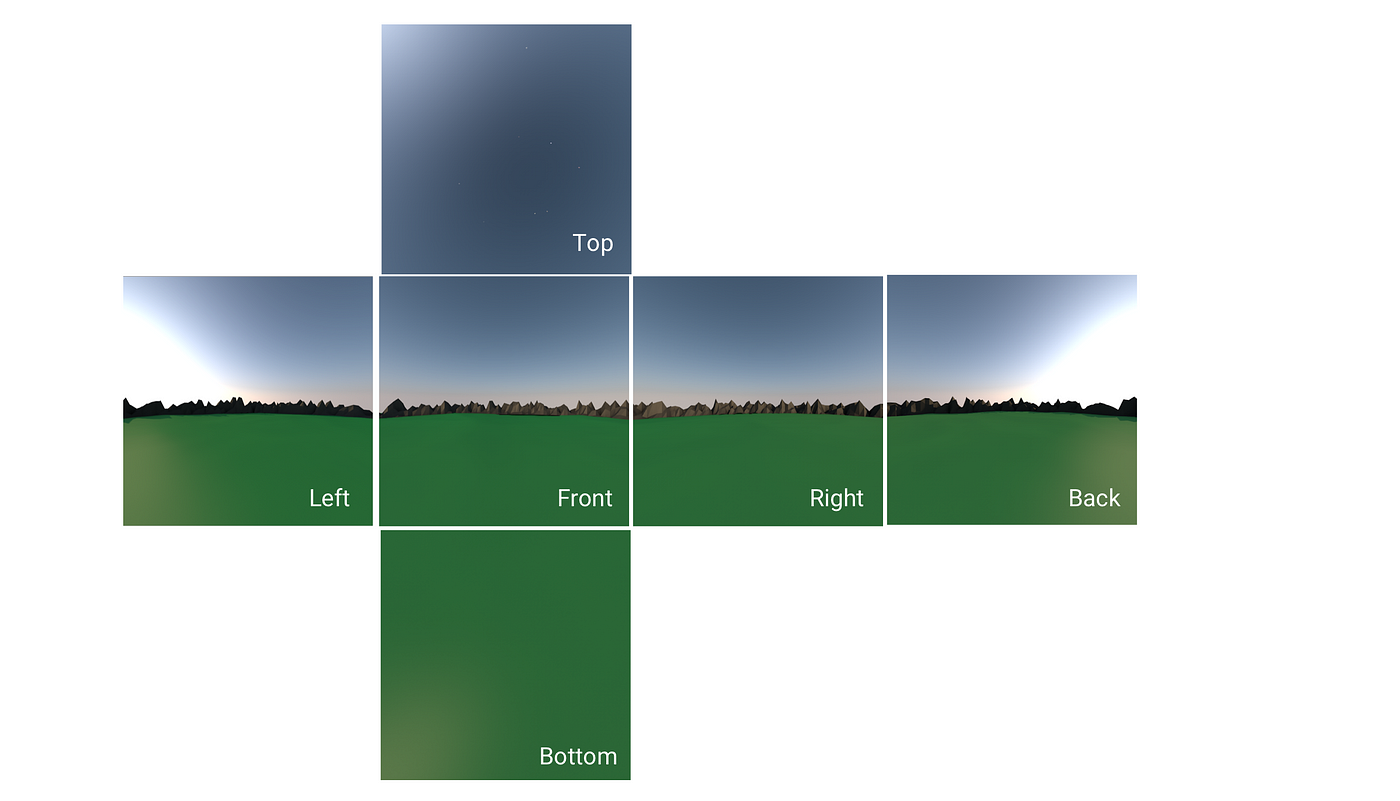
vi). Here's your consequence:
Every angle looks perfect without retouching. Full 360 10 180 views.
If y'all detect issues with seams, yous can take the offending cube map images into Photoshop to edit until you experience it looks correct.
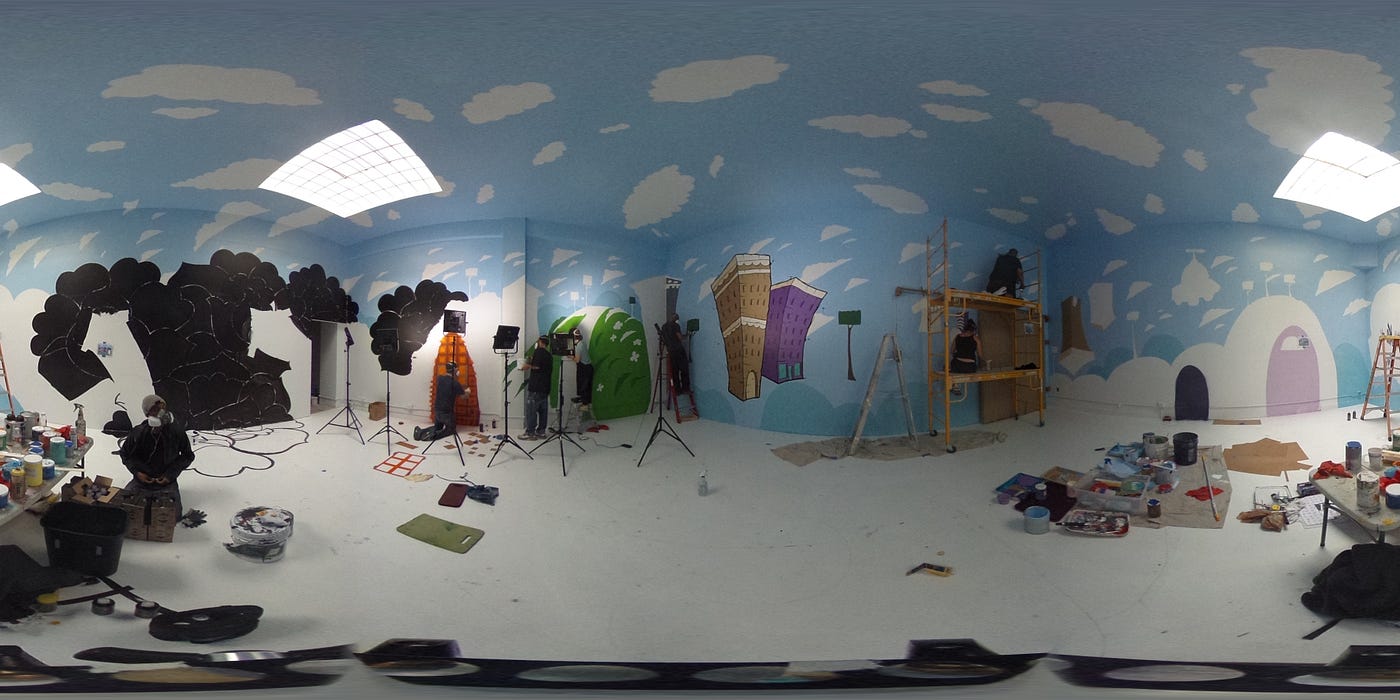
Making a skybox from rendered artwork
In this case, a scene is designed in 3D software and vi-sided cube renderings are captured with cameras mounted in the scene — this can be done with Movie house 4D, Blender, Maya, etc. Then, the skybox is assembled in Unity using the cube mapped method. If you've already obtained 6-sided rendered artwork from elsewhere you lot can skip to the "In Unity" section beneath.
Creating the landscape:
The steps beneath are a brief review of how to create and capture a landscape in Cinema 4D which are detailed in this video.
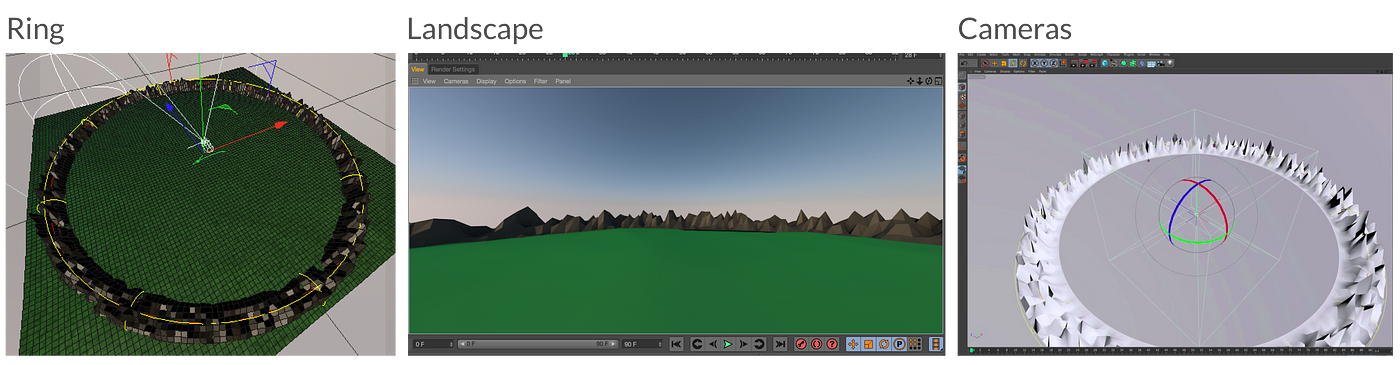
1). Start, create a landscape:
Briefly, in your 3D modeling software of choice, you lot'll construct a scene in a disc/ring shape along a horizontal airplane — this ensures that you lot have a full 360˙ view of your artwork. You can fashion the prototype as desired or add in other 3D elements, just keep the distances in mind and stick to including only horizon elements that are non interactable.
2). Side by side, capture the images:
Position a photographic camera in the center of the scene, slightly raised on the y-centrality so you tin can see below you. Duplicate it so there are six cameras, one in each of the following orientations, then render out each of the images. Make sure to name them appropriately.
Front: 0,0,0
Dorsum: 180, 0, 0
Left: 270, 0,0
Correct: 90, 0, 0
Top: 0, 90, 0
Bottom: 0, -90, 0
Gather the skybox in Unity:
These steps are similar to a 6-sided cube skybox constructed from an image that we discussed previously.
1). Import the six images into Unity equally Textures. For each image, change the Wrap style to Clench to shine out the stitching edges.
2). Create a new Fabric and change its Shader to Skybox, half-dozen-sided. Drag or assign each of your half dozen images into the proper box according to orientation.
3). Assign the Cloth to the Lightbox. Go to the Inspector > Lighting > Scene, so drag the Cloth to the Skybox property.
4). Here's your event:
Making solid color backgrounds without an epitome
This isn't a traditional skybox, just since we're talking nearly backdrops and environmental lighting I thought it deserved mention. Using only color, y'all can create the feeling of dimension and shading, without a complicated groundwork. You lot have a couple of options for making solid backgrounds, depending on the rendering effect yous want.
Pick A: Single colour background
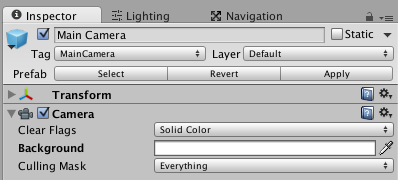
1). In the Lighting panel, ready the skybox Textile to None.
2). And then select the Main Camera from the Bureaucracy. Change Clear Flags to Solid Colour and for the Background, select an RGB colour of your liking. Presto! You lot have a solid colored background.
3). Here's the result:
Option B: Shaded groundwork with a custom mesh
For a colored background with dimension and shading, y'all tin apply a mesh model that wraps around your scene. The model nugget is usually an fbx file synthetic in a 3D application and looks a chip like a large sphere, or in some cases a smashed sphere like the one I'm using here. The shape of the mesh confers a unique rendered look using a shader.
In this sample, I'one thousand using the background asset model called MenuBg with the mesh MenuBg001 from the Unity Oculus VR Samples Project. (Download the project from the asset store and open up it in Unity. Y'all can save the assets yous demand from there.) You could likewise create your own model in a 3D rendering programme.
1). Import the fbx asset MenuBg (MenuBg + MenuBg001) into your Model folder.
2). Setup your Groundwork:
Create an empty GameObject in your scene (Hierarchy > Create > Create Empty) and fix its position to 0,0,0. Change the name to Groundwork. If you don't have anything else in your scene all the same, you tin can add a 3D Object like a cube or sphere at position 0,0,0 but to use for reference.
three). Setup your Mesh:
Create an empty GameObject equally a child of the Background and name it MenuBg.
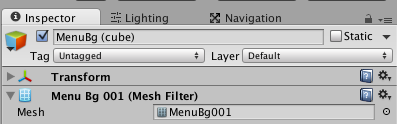
iv). Add a Mesh Filter to the MenuBg object:
(Inspector > Add Component > Mesh Filter) and assign the fbx file mesh MenuBg001.
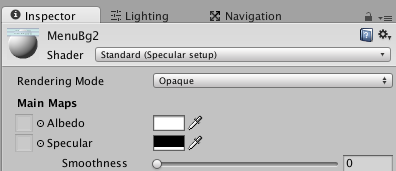
five). You'll likewise need a Textile to render the Shader:
In your Project panel, create a new Material and change the Shader to Standard and exit the Rendering Way Opaque. The standard colour volition exist white, but if yous want to alter the color or shade yous tin can adjust the Albedo and Specular RGB colors. I called my new Material MenuBg2.
six). Now add a Mesh Renderer to the MenuBg object:
(Add Component > Mesh Renderer) and assign the Material you merely created to the Element field. Also, add in a Mesh Collider and set the mesh to MenuBg001.
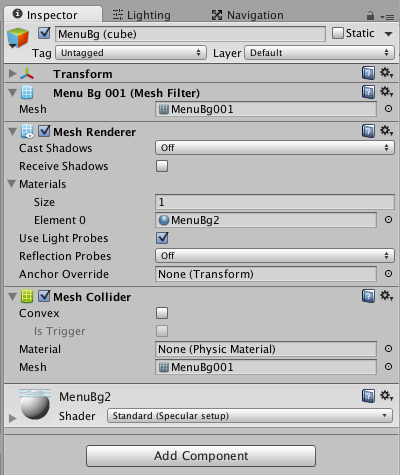
seven). Here's the event:
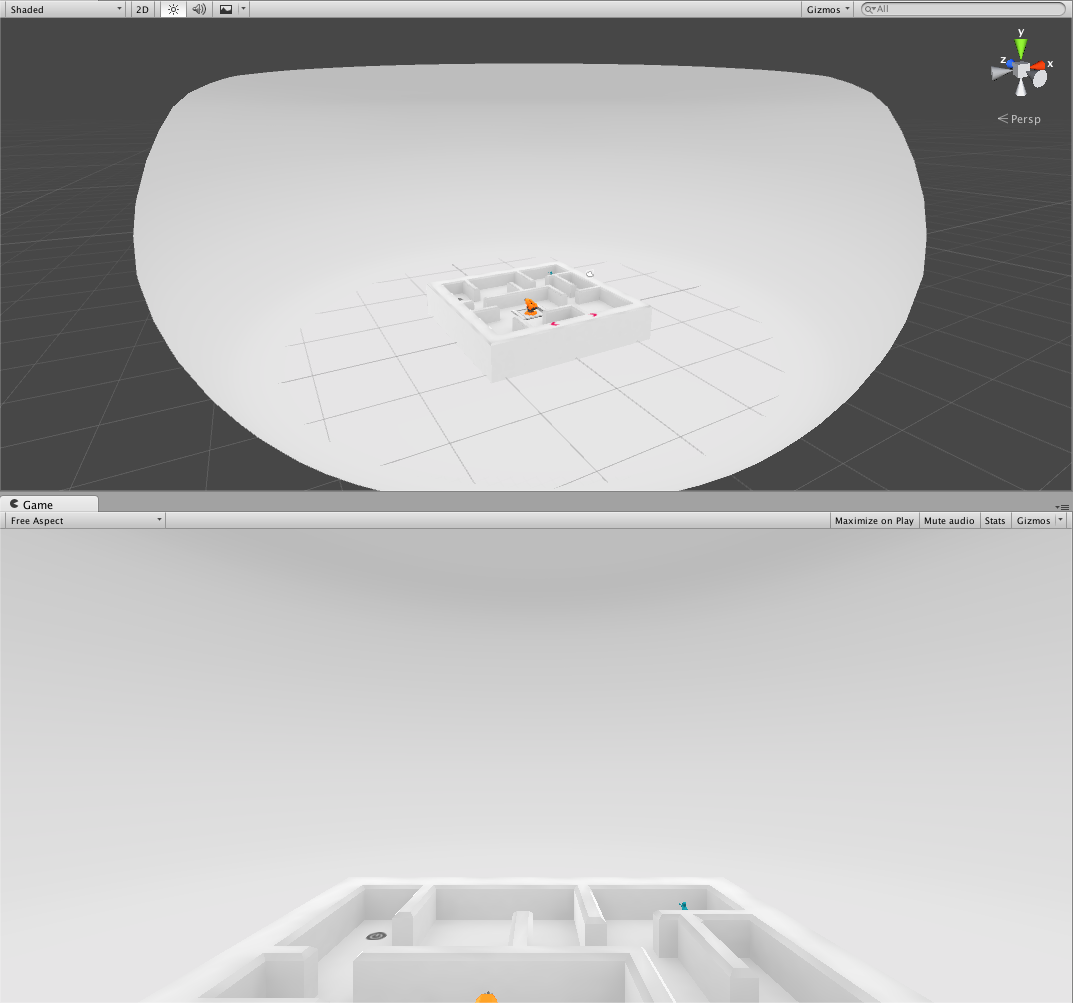
Well, there you get — I hope y'all found these tutorials and reviews helpful. I felt like grouping these ideas together and having these resource in one place helped me quite a chip, so I thought I'd share them. I promise you'll give some of these a shot as you implement skyboxes in your next projection. In that location's pros and cons to each methodology depending on your bandwidth, the wait and experience of the experience you want to create, and the resources that you take admission to.
I expect forwards to seeing what you make!
Source: https://medium.com/@indiecontessa/how-to-design-vr-skyboxes-d460e9eb5a75
0 Response to "Vrchat Get Rid of Skybox on Upload"
Post a Comment